Download Ubuntu 11.04

The most popular Linux distribution in the world.

Ubuntu is a Debian-based Linux distribution.


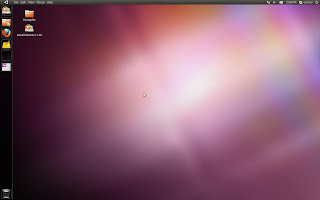
Welcome to Natty Narwhal a.k.a Ubuntu 11.04


Ubuntu is a community developed operating system that is perfect for laptops, desktops and servers. Whether you use it at home, at school or at work Ubuntu contains all the applications you'll ever need, from word processing and email applications, to web server software and programming tools.


Ubuntu is and always will be free of charge. You do not pay any licensing fees. You can download, use and share Ubuntu with your friends, family, school or business for absolutely nothing.


We issue a new desktop and server release every six months. That means you'll always have the the latest and greatest applications that the open source world has to offer.


Ubuntu is designed with security in mind. You get free security updates for at least 18 months on the desktop and server.


Everything you need on one CD, which provides a complete working environment. Additional software is available online.


The graphical installer enables you to get up and running quickly and easily. A standard installation should take less than 25 minutes.


Once installed your system is immediately ready-to-use. On the desktop you have a full set of productivity, internet, drawing and graphics applications, and games.


On the server you get just what you need to get up and running and nothing you don't.
Download Ubuntu 11.04 :

Here are some key features of "Ubuntu":


· Ubuntu will always be free of charge, including enterprise releases and security updates.
· Ubuntu comes with full commercial support from Canonical and hundreds of companies around the world.
· Ubuntu includes the very best translations and accessibility infrastructure that the free software community has to offer.
· Ubuntu CDs contain only free software applications; we encourage you to use free and open source software, improve it and pass it on.
Read More..

Membuat DNS Server LINUX

Perlu diketahui bahwa paket DNS Server di Ubuntu bisa dipilih ketika pertama kali diinstall. Bisa
diperiksa dengan mengetik :
sudo apt-cache policy bind9
contoh di sistem saya :
aspan@aspan-laptop:~$ sudo apt-cache policy bind9
[sudo] password for aspan:
bind9:
Installed: 1:9.7.0.dfsg.P1-1ubuntu0.1
Candidate: 1:9.7.0.dfsg.P1-1ubuntu0.1
Version table:
*** 1:9.7.0.dfsg.P1-1ubuntu0.1 0
500 http://id.archive.ubuntu.com/ubuntu/ lucid-updates/main Packages
500 http://security.ubuntu.com/ubuntu/ lucid-security/main Packages
100 /var/lib/dpkg/status
1:9.7.0.dfsg.P1-1 0
500 http://id.archive.ubuntu.com/ubuntu/ lucid/main Packages
aspan@aspan-laptop:~$
Lihat baris Installed, berarti bind9 sudah terinstall di sistem saya.
Jika belum terinstall, lakukan install, update dulu ketik :
sudo apt-get update


lalu install ketik :
sudo nano apt-get install bind9
Setelah itu langsung saja disetting, masuk ke direktori bind untuk berkenalan dulu dengan file-file bind,   
ketik :
cd /etc/bind/
ketik :
ls
contoh di sistem saya :
aspan@aspan-laptop:~$ cd /etc/bind
aspan@aspan-laptop:/etc/bind$ ls
bind.keys db.255 db.ip named.conf named.conf.options
db.0 db.coba db.local named.conf.default-zones rndc.key
db.127 db.empty db.root named.conf.local zones.rfc1918
aspan@aspan-laptop:/etc/bind$
perhatikan file yang bernama db.local. Copy file tersebut, ketik :
sudo cp db.local db.coba
tercipta sebuah file yang bernama db.coba, langsung saja diedit, ketik :
sudo nano db.coba
isinya kurang lebih seperti ini :
;
; BIND data file for local loopback interface
;
$TTL 604800
@ IN SOA localhost. root.localhost. (
2 ; Serial
604800 ; Refresh
86400 ; Retry
2419200 ; Expire
604800 ) ; Negative Cache TTL
;
@ IN NS localhost.
@ IN A 127.0.0.1
@ IN AAAA ::1
ubah menjadi seperti di bawah ini :
;
; BIND data file for local loopback interface
;
$TTL 604800
@ IN SOA ns.aspan.net. root.aspan.net. (
2 ; Serial
604800 ; Refresh
86400 ; Retry
2419200 ; Expire
604800 ) ; Negative Cache TTL
;
IN NS ns.aspan.net.
IN A 192.168.1.10
ns IN A 192.168.1.10
@ IN AAAA ::1
www IN CNAME ns
ftp IN CNAME ns
smtp IN CNAME ns
fulan IN CNAME ns
chat IN CNAME ns
Penjelasan :
No Asal Perubahan
localhost ns.aspan.net
root.localhost. ns.aspan.net
@ IN NS localhost. IN NS ns.aspan.net.
@ IN A 127.0.0.1 @ IN A 192.168.88.13
(tambahan) ns IN A 192.168.88.13
www IN CNAME ns
ftp IN CNAME ns
smtp IN CNAME ns
fulan IN CNAME ns
chat IN CNAME ns
copy file db.coba menjadi db.ip, ketik :
sudo cp db.coba db.ip
edit, ketik :
sudo nano db.ip
;
; BIND data file for local loopback interface
;
$TTL 604800
@ IN SOA ns.aspan.net. root.aspan.net. (
2 ; Serial
604800 ; Refresh
86400 ; Retry
2419200 ; Expire
604800 ) ; Negative Cache TTL
;
@ IN NS ns.aspan.net.
13 IN PTR ns.aspan.net.
ns IN A 192.168.88.13
@ IN AAAA ::1
Penjelasan :
13 adalah host ID dari ip address DNS Server
kemudian edit file named.conf, ketik :
sudo nano named.conf
isinya kurang lebih seperti ini :
// prime the server with knowledge of the root servers
zone "." {
type hint;
file "/etc/bind/db.root";
};
// be authoritative for the localhost forward and reverse zones, and for
// broadcast zones as per RFC 1912
;
$TTL 604800
@ IN SOA ns.aspan.net. root.aspan.net. (
2 ; Serial
604800 ; Refresh
86400 ; Retry
2419200 ; Expire
604800 ) ; Negative Cache TTL
;
@ IN NS ns.aspan.net.
13 IN PTR ns.aspan.net.
ns IN A 192.168.88.13
@ IN AAAA ::1
Penjelasan :
13 adalah host ID dari ip address DNS Server
kemudian edit file named.conf, ketik :
sudo nano named.conf
isinya kurang lebih seperti ini :
// prime the server with knowledge of the root servers
zone "." {
type hint;
file "/etc/bind/db.root";
};
// be authoritative for the localhost forward and reverse zones, and for
// broadcast zones as per RFC 1912
zone "aspan.net" {
type master;
file "/etc/bind/db.coba";
};
zone "88.168.192.in-addr.arpa" {
type master;
file "/etc/bind/db.ip";
};
zone "0.in-addr.arpa" {
type master;
file "/etc/bind/db.0";
};
zone "255.in-addr.arpa" {
type master;
file "/etc/bind/db.255";
};
restart service bind9 ketik :
sudo /etc/init.d/bind9 restart
kemudian buat seluruh client menggunakan DNS yang telah kita buat. Jika di sistem Linux IP DNS
Server bisa kita masukan di file /etc/resolv.conf, ketik :
sudo nano /etc/resolv.conf
search aspan.net
nameserver 192.168.88.13
jika menggunakan network manager silakan lihat screenshot :
test domain dengan perintah :
dig -x aspan.net
; <<>> DiG 9.7.0-P1 <<>> -x aspan.net
;; global options: +cmd
;; Got answer:
;; ->>HEADER<<- opcode: QUERY, status: NXDOMAIN, id: 15242
;; flags: qr rd ra; QUERY: 1, ANSWER: 0, AUTHORITY: 1, ADDITIONAL: 0
;; QUESTION SECTION:
;net.aspan.in-addr.arpa. IN PTR
;; AUTHORITY SECTION:
in-addr.arpa. 10800 IN SOA A.ROOT-SERVERS.NET. dns-ops.ARIN.NET.
2011021110 1800 900 691200 10800
;; Query time: 258 msec
;; SERVER: 192.168.1.10#53(192.168.1.10)
;; WHEN: Sat Feb 12 00:15:36 2011
;; MSG SIZE rcvd: 107
Read More..

Menambahkan Sudoers pada Ubuntu

Sebagai pengguna Ubuntu, pasti kenal dengan istilah Sudo. Ya, ini adalah perintah untuk "menaikkan" hak akses user menjadi setingkat dengan root.
Tetapi, tidak semua user dapat menjalankan perintah sudo. User tersebut harus terdaftar pada sebagai Sudoers.
Untuk menambahkan user menjadi sudoers, berikut caranya :
1. Buka console Anda
2. Ketikkan 'sudo visudo' (tanpa tanda petik). Bingung? Tentunya perintah ini dijalankan oleh user yang sudah sebagai sudoers. Saat pertama kali install ubuntu, user pertama yang diciptakan sudah otomatis menjadi anggota Sudoers.
3. Pada baris root ALL=(ALL) ALL tambahkan : user ALL=(ALL) ALL
4. Ganti 'user' menjadi username yang terdaftar pada Ubuntu. Contoh : pungki ALL=(ALL) ALL
5. Tekan Ctrl-X dan simpan setting tersebut.
6. Tidak perlu restart, perubahan ini akan aktif seketika.
Selamat mencoba :D
Read More..

Transparent v2 (Pidgin Screenlet theme) description

Transparent theme for the Pidgin screenlet

Transparent v2 is a modified version of the original Transparent theme for the Pidgin screenlet, to use the original Pidgin icons.

Developer comments

I've also changed some settings and fixed some bugs.

Installation:

Install in ~/.screenlets/pidgin/themes

About Screenlets:

Screenlets is the name of both a set of independently-developed widget applications and the widget engine which runs them. The engine runs primarily on X11-based compositing window managers, most notably the Compiz (under Linux) architecture.

Until 0.0.14, screenlets were exclusively scripted in Python and drawn in SVG. Afterward, support was added for web widgets (widgets which are written in HTML, JavaScript and CSS, similar to widgets for Apple Inc.'s Dashboard).

Download 

Transparent theme for the Pidgin screenlet

http://linux.softpedia.com/progDownload/Transparent-v2--Pidgin-Screenlet-theme-Download-42818.html

Read More..

Pendaftaran Siswa Baru SMA POMOSDA Tahu Ajaran 2011-1012

a. Syarat Pendaftaran :
1.       Mempunyai minat yang kuat untuk melanjutkan pendidikan di SMA POMOSDA
2.       Telah dinyatakan lulus sekolah di tingkat SMP/MTS atau yang sederajat, dengan ditunjukkan Surat Keterangan Lulus
3.       Maksimal berusia 17 tahun pada tanggal 1 Juli 2011
4.       Sehat jasmani dan rohani dibuktikan dengan surat keterangan sehat dari Dokter dan balai kesehatan POMOSDA
Penerimaan Santri Baru SMA POMOSDA
SMA POMOSDA
b. Cara Pendaftaran
i.       Calon Siswa/santri dan atau orang tua datang langsung ke sekretariat PSB SMA POMOSDA atau melalui perwakilan-perwakilan yang ditunjuk.

ii        Membayar uang pendaftaran untuk mendapatkan formulir pendaftaran.
iii.      Mengisi dan menyerahkan kembali formulir pendaftaran yang dilampiri dengn kelengkapan persyaratan administrasi berupa :


a. Fotocopi ijazah SMP/MTs atau sederajat yang telah dilegalisir sebanyak 3 lembar beserta ijazah asli
b. Fotocopi SKHUN yang dilegalisir sebanyak 2 lembar.
c. Fotocopi Nomor Induk Siswa Nasional (NISN) sebanyak 2 lembar
d. Fotocopi raport SMP/MTS semester 4,5 dan 6 sebanyak 1 lembar
e. Foto terbaru hitam putih 3x4 sebanyak 4 lembar
f. Surat keterangan Berkelakuan Baik dari sekolah asal.
g. Surat Keterangan Sehat dari Dokter atau Rumah Sakit

Waktu & Tempat  Pendaftaran :
Waktu pendaftaran Mulai Tanggal  01 juni - 08 juli 2011 (Gelombang I) 11 Juli - 21 Juli (Gelombang II)
Tempat di kampus SMA POMOSDA
Jl. Kh wachid hasym 312 Tanjunganom, Nganjuk Jawa Timur 64483 Telp (0358) 771589 fax: (0358) 773351

Pelaksanaan, Materi & Pengumuman Tes Seleksi
1.       Seleksi berkas tanggal 05 Juli 2011 (Gelombang I), 21 Juli 2011 (Gelombang II)
2.       Tes dan Wawancara 9-10 Juli (Gelombang I), 22-23 Juli (Gelombang II)
3.       Pengumuman testing 10 Juli 2011 (Gelombang I), 23 Juli (Gelombang II)
4.       OTRIBA 11 - 13 Juli 2011

Rincian  Biaya Pendaftaran
1.       Pendaftaran: Rp. 100.000,-
2.       Seragam dan Sarpras santri Baru : Rp 960.000,
Seragam sekolah, peralatan tidur, makan, almari dan kelengkapan belajar
(Dapat dibayarkan selama 1 (satu) tahun)
3.       SPP/Jariyah  Perbulan : Rp. 350.000,-
Biaya makan  3 x sehari, air dan listrik, dana kesehatan dan simpanan siswa
4.       Dana Pengembangan Pendidikan: Rp. 1.000.000,- (Gelombang I), Rp. 1.500.000,- (Gelombang II)
(Dapat diangsur selama 6 bulan/ 1 semester)
 Total Rp. 2.510.000,- (Gelombang I) Rp. 3.010.000,- (Gelombang II)


Read More..

How To Install Gnome 3 Desktop In Ubuntu Linux? "via PPA"

Gnome 3 is now finally available. However it will take some time before major Linux distributions start integrating Gnome 3 Desktop into their systems. Mean while, you can try Gnome 3using a Live CD for your favourite Linux distribution. In case you are looking to install Gnome 3 Desktop on your Ubuntu 11.04 system in order to get a better feel, then here is a tutorial for you.

Gnome 3 looks so awesome!
ATTENTION: We would like to say before hand that installing Gnome 3 on your system may break it and renderGnome 3 repository is highly unstable even now. So in case you are planning to install Gnome 3 on your production system, we would recommend you to hold on till your distribution comes out with a supported version of Gnome 3. many things un-usable as the


 Installing Gnome 3 Desktop in Ubuntu 11.04 Natty Narwhal
Step 1: Install the Gnome 3 team's Ubuntu PPA (repository) using this command:
sudo apt-add-repository ppa:gnome3-team/gnome3
Step 2: Now update your software sources:
sudo apt-get update
Step 3: Install the Gnome 3 Desktop environment using this command:
sudo apt-get install gnome-desktop3
If the above does not work for you, then you can try the following, as suggestedmentioned user has talked about) by Aechols in the comments. (Please not we have not tested these steps, which the above
sudo apt-get dist-upgrade
sudo apt-get install gnome-shell
sudo apt-get install gnome3-session
 Installing Gnome 3 Desktop in Ubuntu 10.10 Maverick Meerkat
Gnome 3 Desktop can be installed in Ubuntu 10.10 Maverick using the following commands. Please note that this PPA (For Ubuntu 10.10) is old and hasn't been updated unlike Natty and there is NO WAY TO ROLL BACK!
sudo add-apt-repository ppa:ubuntu-desktop/gnome3-builds 
sudo apt-get update
sudo apt-get install gnome-desktop3
Reboot your computer after the installation is over so that the new components and the environment can sink in properly. In case you are facing a problem or want to report a bug, you can do it here.

Read More..

Install Clementine Music Player In Windows & Apple Mac OS

Clementine is a rip-off from the famous KDE based linux music player and manager Amarok. Well, the good part about Clementine is that it is cross platform which means you can use it on Linux, Windows & Macintosh OS.
The latest version of Clementine has some amazing features such as a built-in lyrics downloader and manager, artist info finder, Last.fm & Magnatune integration and a lot more. As of writing this post, Clementine was in the version 0.7. Here are the download links for the Clementine music player on Windows and Apple Mac OS.

You can also check the Clementine downloads page for an updated version of the music player in case an updated version is available.


Read more about the Clementine Music Player. Here are a few screenshots of the Clementine music player at action on Windows and Mac OS.

Clementine running on Windows 7

Clementine running on Apple Mac OS
Read More..

How To Create A Gnome 3 Live USB Stick "Fedora, OpenSUSE, Ubuntu"

 Gnome 3 Desktop environment has now been released and will soon find it's way to most of the Linux Distributions out there - like Fedora, OpenSUSE & Ubuntu. We have already told you how to install Gnome 3 on Ubuntu or try it as a Live environment on Fedora or OpenSUSE. In this article we will tell you how to create a Live USB Stick for Gnome 3.

Applets and Dockbar in Gnome 3

Step 1: Download the Gnome 3 Live ISO of your choice from this page.
Step 2: Now, download the tarball package of the USB Image Writer and extract it's contents to a folder.

Step 3: Open a terminal and navigate to the folder where you have extracted the contents of the image writer package (eg. $ cd Downloads/abock-image-usb-stick-f3b1002)
Step 4: Prepare the image writer by running this command in a terminal:
$ chmod a+x ./image-usb-stick
Step 5: Remove any USB storage devices that you might have connected to your computer and insert the empty USB stick that you want to write to.
Step 6: Run the image writer script from a terminal:
sudo ./image-usb-stick path_to_the_live_image.iso
Step 7: To run the live image, reboot your computer with the USB stick attached.
Read More..

Linux and Windows

This section is about getting Linux and Windows to work together, either in the same network or even on the same machine. It also talks about things you can do to help yourself (and others) ugrade from Windows to Linux.
One common argument against Linux is the lack of software. That is just a myth. There are replacements/equivalents for every imaginable type of software. The only problem you might encounter is when you need a very specific feature that only one software product has or need a special format. Note that "special format" typically means propriatary, as you can bet that Linux supports all open standards.
For a list of replacements/equivalents, check out these two places:

  • Linux software equivalent to Windows software

  • The table of equivalents / replacements / analogs of Windows software in Linux.

  • Read More..

    Linux configure modem to connect to the Internet using a PPP dialup account

    I want to configure modem to dial out and connect to the Internet. Since I don't have good display card, I am not using the X window system. How do I configure (external) modem to connect to the Internet using a PPP dialup account under Debian Linux?
    A. It is true that dialup modems have become almost obsolete due to broadband Internet connections, there are still situations where dialup access can prove useful :)

    Under Linux you can dial out using program called wvdial. It is a PPP dialer with built-in intelligence. It dials a modem and starts PPP in order to connect to the Internet. The connection started with wvdial can be dropped by switching back to the terminal from where it was started and pressing ctrl-C.
    The default configuration file is: /etc/wvdial.conf.

    Installation

    Since you are using Debian Linux, use apt-get (assuming that CDROM is your source):
    # apt-get install wvdial
    Other Linux distribution users can download wvdial from Internet or install from your distribution CD/DVD-ROM disk.

    Configuration

    First, make sure modem is installed and type the following command to configure the modem:
    # wvdialconf /etc/wvdial.conf
    Once modem is detected you need to edit /etc/wvdial.conf configuration file to specify the PPP username, password and dial out phone number.
    For example:
    [Dialer Defaults]
    Modem = /dev/ttyS1
    Baud = 115200
    Init1 = ATZ
    Phone = 172226
    Username = Your-USERNAME
    Password = Your-PASSWORD

    Save and close the file.
    To connect to internet type command:
    # wvdial
    To disconnect, switch back to the terminal from where it was started and pressing CTRL+C.
    Read More..

    20 Linux Server Hardening Security Tips

    Ringkasan ini tidak tersedia. Harap klik di sini untuk melihat postingan.
    Read More..

    Wireless cell phone video surveillance solution is here adding a sense of private protection and safety it offers you real-time video monitoring.

    Wireless mobile phone video surveillance solution This technology utilizes the most powerful software applications for distantly monitoring from Everywhere in the world.
    This is a solution that will turn any regular cell phone into a high end security device.
    The surveillance system brings video from video source such as USB or IP Webcam to your mobile phone. It contains both the client and server application.

    You can connect to your residence, business, babysitter, parents, pets, etc.

    You can watch online shots from your webcams on mobile phone through any kind of ip connection from any location in the world. In case of intrusion, a real scene helps prevent false alarm and cancel police dispatches to avoid the fines.
    Enjoy the liberty of viewing all your webcams on cell phone anytime and from anyplace with just the touch of a button.

    How does cellular security work:

    You connect your webcam (USB, IP camera, or Camcoder) to your home pc and setup the software.
    The application records video and audio from webcam and sends it, as compressed media stream, to web server.
    You login to this Web server from your mobile phone and see your camera.
    No special application for your mobile phone is necessary.

    All about cellular video security.

    Get cash from your website. Sign up as affiliate.

    Bisnis your Web

    affiliate program

    EARN INCOME FROM YOUR WEBPAGE

    Turn your valuable webpage visitors into money. Work online and join our free money making partner program. We offer the most payment rate to help increase your cash stream.

    Join our money making program absolutely no charge and 100% risk free.

    Sign Up...

    FREE INVESTMENT PROGRAM

    We designed this money earn system specially for NO SETUP FEE methods, to make hundreds, if not millions of dollars, without spending something.

    Start receiving serious affiliate commissions

    Our money earn system really can give you money on the same day. Begin collecting steady partner commissions with almost no investments at all. This is a profitable business opportunity, the chance for you to create a solid, reliable, long-term profitable business.

    Get paid after you not working

    Create many new revenue incomes each and every day. Get paid after you stop working or even retire at an young age with a broad cash stream. Do this one time and get revenue over and over again. It's best time to create mind-blowing new levels of profit and success on the Internet.

    Cell Phone Advertising System cell phone advertising,bruce shilander,shilander marketing